How to Build a Small Root Cellar for Under $200 – No Basement Required
Stop letting your garden harvest rot in the fridge. A DIY root cellar keeps potatoes, carrots, and apples fresh for months—no electricity required. And when the power goes out, it might just keep your family fed.
You grew those vegetables. You watered them, weeded them, and fought off pests. Then you haul them inside, stuff them into a refrigerator that’s already full of craft beer and leftover pizza, and watch them shrivel up two weeks later.
There’s a better way. And your great-grandfather knew it.
A small root cellar uses the earth’s natural stable temperature and humidity to keep winter squash firm into March, carrots crisp until spring, and apples sweet through the holidays. Best of all? You can build one in a weekend with basic tools and materials from any hardware store.
This guide walks you through everything: where to put it, what to build it with, how to keep air moving, and exactly which vegetables thrive down there.
Why You Actually Need a Root Cellar
Let’s skip the romantic homesteading talk. Here’s what a DIY root cellar does for you:
- Saves money. No more buying $5 bags of limp celery in February.
- Reduces waste. That fridge drawer of forgotten vegetables? Gone.
- Works without power. Grid goes down? Your food stays fine.
- Tastes better. Root‑cellared vegetables retain flavor and texture that supermarket produce loses.
- Prepares you for the worst. Ice storm, hurricane, grid failure, or simply a blown transformer—your food doesn’t care.
Common root cellar uses:
- Storing potatoes, onions, garlic, carrots, beets, parsnips, turnips
- Keeping winter squash and pumpkins for months
- Holding apples and pears (separately—apples give off ethylene gas that ruins vegetables)
- Fermenting sauerkraut or kimchi
- Aging hard cheese or curing cured meats
- Storing extra seed potatoes for next year’s planting
Grid Failure and Emergency Preparedness: Why This Matters More Than Ever
Here’s something most “survival” guides get wrong: they tell you to stockpile canned goods and freeze-dried meals. That’s fine. But those supplies run out. And they cost a fortune.
A root cellar is the original off-grid food storage. No generator. No propane. No solar panels. Just six feet of dirt keeping your food at 38°F while the world above ground goes dark.
Consider this:
- A refrigerator stops working the moment the power fails. A root cellar doesn’t care.
- A freezer stays cold for 24–48 hours if you never open it. Then everything thaws and rots.
- Canned goods last years, but they’re expensive to buy and time‑consuming to home‑can.
A properly built root cellar keeps food fresh for 3–6 months with zero energy input.
That means if a winter ice storm knocks out power for two weeks, you’re not standing in line at a FEMA distribution center. You’re walking to your backyard, pulling out carrots and potatoes, and cooking dinner like nothing happened.
Pro tip for preppers: Build your root cellar with a hidden entrance—a hinged hatch covered with grass or a fake rock. Keep a secondary food cache inside (rice, beans, salt) alongside your fresh produce. And always store a hand‑crank thermometer and a manual can opener down there. You’ll thank yourself later.
External resource: [Ready.gov – Long-term food storage without electricity]
First: Choose the Right Spot
Not every yard works. But most do, with a little creativity.
Ideal conditions for a small root cellar:
- Temperature: 32°F to 40°F (0°C to 4°C). Cold enough to slow spoilage, warm enough to prevent freezing.
- Humidity: 85–95%. Keeps root vegetables from drying out.
- Darkness: No light. Light triggers sprouting in potatoes and onions.
- Concealment (optional): If you’re building for emergency preparedness, choose a spot that’s not visible from the road or neighbor’s window.
Your site options (ranked by difficulty):
| Option | Best for | Difficulty |
|---|---|---|
| Existing basement corner | Easy access, already underground | Low |
| Crawl space under house | Free space, stable temps, hidden | Low |
| North‑facing hillside | Natural insulation, easy drainage | Medium |
| Backyard trench (mounded over) | Flat yards with no hill | Medium |
| Inside an unheated garage or shed | Quick build, but less stable | Low–Medium |
Pro tip: A north‑facing slope is ideal. The earth stays cooler, and you can dig straight into the hill. No hill? No problem. You’ll build an above‑ground mound instead (step by step below).
Materials You’ll Need
Keep it simple. You don’t need concrete or fancy lumber.
Essential materials:
- Pressure‑treated or cedar lumber (for door frame and bracing)
- Plywood or corrugated metal (for walls and roof)
- Rigid foam insulation (at least 2 inches thick, R‑value of 10 or higher)
- 6‑mil plastic sheeting (vapor barrier)
- PVC pipe (for ventilation—two pipes, 4 inches diameter)
- Hardware cloth (1/4‑inch mesh, to keep rodents out)
- Exterior screws and nails
- Hinges and a latch for the door
Tools:
- Shovel and digging bar
- Circular saw or hand saw
- Drill
- Staple gun
- Utility knife
- Level
- Tape measure
Affiliate link placeholder: [Shop root cellar building kits on Amazon]
Step‑by‑Step: Build a Small Root Cellar Yourself
Let’s assume you’re building into a gentle slope or a mounded trench—the most common approach for homeowners without a basement.
Step 1: Dig the Hole
Excavate a hole roughly 6 feet long, 4 feet wide, and 5 feet deep. The floor should slope slightly toward one corner for drainage. Slope about 1 inch per 4 feet.
External resource: [USDA guide to root cellar construction (PDF)]
Step 2: Lay the Gravel Floor
Spread 4–6 inches of clean gravel on the bottom. This keeps vegetables off the dirt and allows moisture to drain. Tamp it flat. No concrete needed—gravel actually helps maintain humidity.
Step 3: Build the Walls
For a small root cellar, you don’t need poured concrete. Use one of these methods:
- Cement block: Stack dry (no mortar) for easy assembly. Fill cores with gravel for stability.
- Treated plywood: Fast and cheap. Line the inside with rigid foam insulation.
- Corrugated metal: Rust‑resistant and durable. Also insulate the interior.
Whichever you choose, leave a 30‑inch wide opening for the door on the north or east side (shade side).
Step 4: Install the Vapor Barrier
Staple 6‑mil plastic sheeting to the inside of your walls, overlapping seams by at least 12 inches. This stops groundwater from seeping in while keeping humidity high inside.
Step 5: Add Insulation
Cut rigid foam insulation (2‑inch thickness minimum) to fit inside the vapor barrier. The foam goes directly against the walls, under the roof, and on the door. Tape seams with foil tape.
Recommended product placeholder: [R‑10 rigid foam insulation board – Lowes]
Step 6: Build the Roof
Lay 2×6 or 2×8 lumber across the top as rafters. Cover with plywood, then add at least 6 inches of soil on top (12 inches if you live in a very cold climate). The soil provides natural insulation.
For a mounded design (no hill), pile soil over the entire structure so it looks like a small grassy bump in your yard.
Step 7: Install Ventilation – The Most Critical Step
Root cellars fail without proper airflow. You need two PVC pipes:
- Intake pipe: Runs from near the floor up to ground level, facing north. Brings in cool, fresh air.
- Exhaust pipe: Runs from the ceiling up to ground level, facing south. Releases warm, stale air and ethylene gas.
Both pipes should be 4 inches in diameter. Cover each end with hardware cloth to block mice and insects. Install a manual damper inside each pipe to control airflow in winter.
External video: [How to install root cellar ventilation – YouTube]
Step 8: Build the Door
Cut a piece of plywood to fit your door opening. Screw rigid foam insulation to the inside. Seal the edges with weatherstripping. Install heavy hinges and a latch that can be opened from inside (safety first—never lock yourself in).
Paint the outside with exterior paint or cover with metal sheeting to resist weather. Add a small strip of wood at the bottom to act as a kickplate for mice.
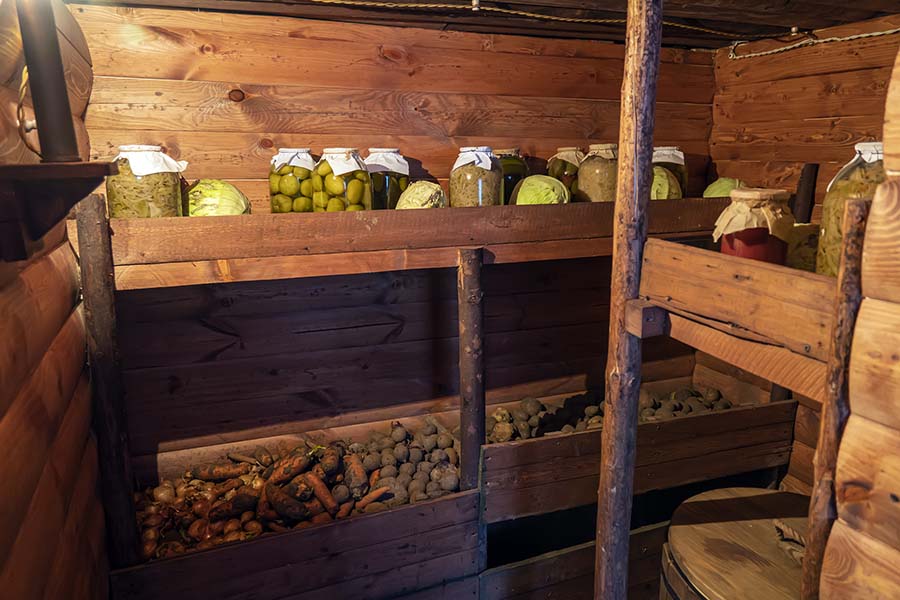
Step 9: Fill with Shelves and Bins (Optional but Recommended)
Simple wooden shelves keep produce off the floor and improve airflow. Open crates and slatted bins work better than solid boxes. Label everything—you’ll forget what’s where by January.
Ideal Storage Conditions by Vegetable
Use this quick reference when loading your small root cellar:
| Vegetable | Temperature | Humidity | Storage Life |
|---|---|---|---|
| Potatoes | 38–40°F | 85–90% | 4–6 months |
| Carrots, beets, parsnips | 32–35°F | 90–95% | 4–5 months |
| Onions, garlic | 32–35°F | 65–70% | 3–4 months |
| Winter squash | 50–55°F | 50–70% | 3–5 months |
| Apples | 32–35°F | 85–90% | 3–4 months |
| Cabbage | 32–35°F | 90–95% | 3 months |
Source: [University of Minnesota Extension – Storing Vegetables in a Root Cellar]
Critical note: Store apples separately from everything else. They release ethylene gas that makes potatoes sprout and carrots bitter.
Simple Maintenance: Set It and Forget It
A DIY root cellar runs on passive physics—no fans, no heaters. But you do need to check a few things weekly:
- Temperature: Keep a min‑max thermometer on the wall. Target 35–40°F.
- Humidity: If vegetables are shriveling, add a bucket of water or wet burlap. If mold appears, increase ventilation.
- Airflow: Adjust the dampers as seasons change. Open more in fall and spring, close slightly in deep winter.
Product link placeholder: [Root cellar thermometer with humidity gauge – Home Depot]
FAQ: Common Root Cellar Concerns
Q: Can I build a small root cellar in a flat yard with no hill?
Yes. Build an above‑ground “mound” cellar: construct a box from plywood or concrete block, insulate heavily, pile 12–18 inches of soil over the top and sides, and plant grass on the mound. It looks like a small hill from the street—and doubles as camouflaged storage.
Q: Will my root cellar freeze in the winter?
Not if you insulate properly and keep the door sealed. In extreme cold, add straw bales against the exterior door. If temperatures inside drop below 32°F, close the intake vent and open a small container of water inside (freezing water releases heat).
Q: How do I keep mice and rats out?
Hardware cloth over all vents. Steel wool packed around door gaps. Never store pet food or birdseed in the same space. Check traps monthly.
Q: What about mold?
Mold means too much humidity and not enough ventilation. Open your vents wider. Remove any rotting vegetables immediately—one bad potato spoils the whole bin.
Q: How much does a DIY root cellar cost?
A basic small root cellar built into an existing basement corner: $50–100. A hillside or mounded design: $200–400. A poured concrete professional cellar: $2,000+. Most handymen can do the $200 version in a weekend.
Q: How long will food last during a grid‑down scenario?
Properly stored root vegetables last 3–6 months at 35–40°F. If you stock your cellar in October, you’re eating fresh produce until March or April—well past any realistic winter power outage. For longer emergencies, rotate your stores annually and supplement with canned goods and dried beans.
Affiliate link placeholder: [Complete root cellar building plans – PDF download]
The Bottom Line
You don’t need a farm or a degree in horticulture. You need a shovel, a Saturday, and the willingness to dig a hole.
A build a root cellar yourself project pays off every time you walk past the grocery store’s $4.99‑per‑pound organic carrots and pull out your own—crisp, sweet, and harvested six months ago.
And when the lights go out? While your neighbors are panicking over spoiled milk and thawing chicken, you’ll be pulling potatoes out of the ground, lighting a lantern, and cooking dinner like nothing happened.
Start small. Use the north corner of your basement or a shady spot behind the garage. Once you taste a February carrot that crunches like it was pulled yesterday, you’ll wonder why you didn’t build this years ago.
Now go dig.
For more DIY projects and manly skills, subscribe to The Manly Arts newsletter.