5 Simple Carpentry Projects Every Guy Can Actually Do
Spoiler alert: You don’t need a professional workshop or twenty years of experience to make something cool with your hands.
Why Carpentry? (Beyond the Obvious)
Carpentry – Build Something Useful: Let’s be honest for a second. Most of us spend our days staring at screens, answering emails, and solving problems that don’t physically exist. There is something deeply satisfying about closing your laptop, walking into a garage or backyard, and making something.
Carpentry for beginners isn’t about becoming the next Norm Abram. It’s about:
- Building confidence – That first project you finish? You’ll look at it every day and think, “I made that.”
- Saving money – A decent entry bench from a store costs $150. The wood to build one yourself? Maybe $40.
- Controlling quality – That store-bought TV stand is particle board. Yours will be solid wood that outlives you.
- Lowering stress – There’s a reason woodworking is compared to meditation. Repetitive motion. Measurable progress. A finished product. It works.
And here’s the secret the pros don’t tell you: Every expert carpenter started with a crooked cut and a project that didn’t quite work. The only difference is they kept going.
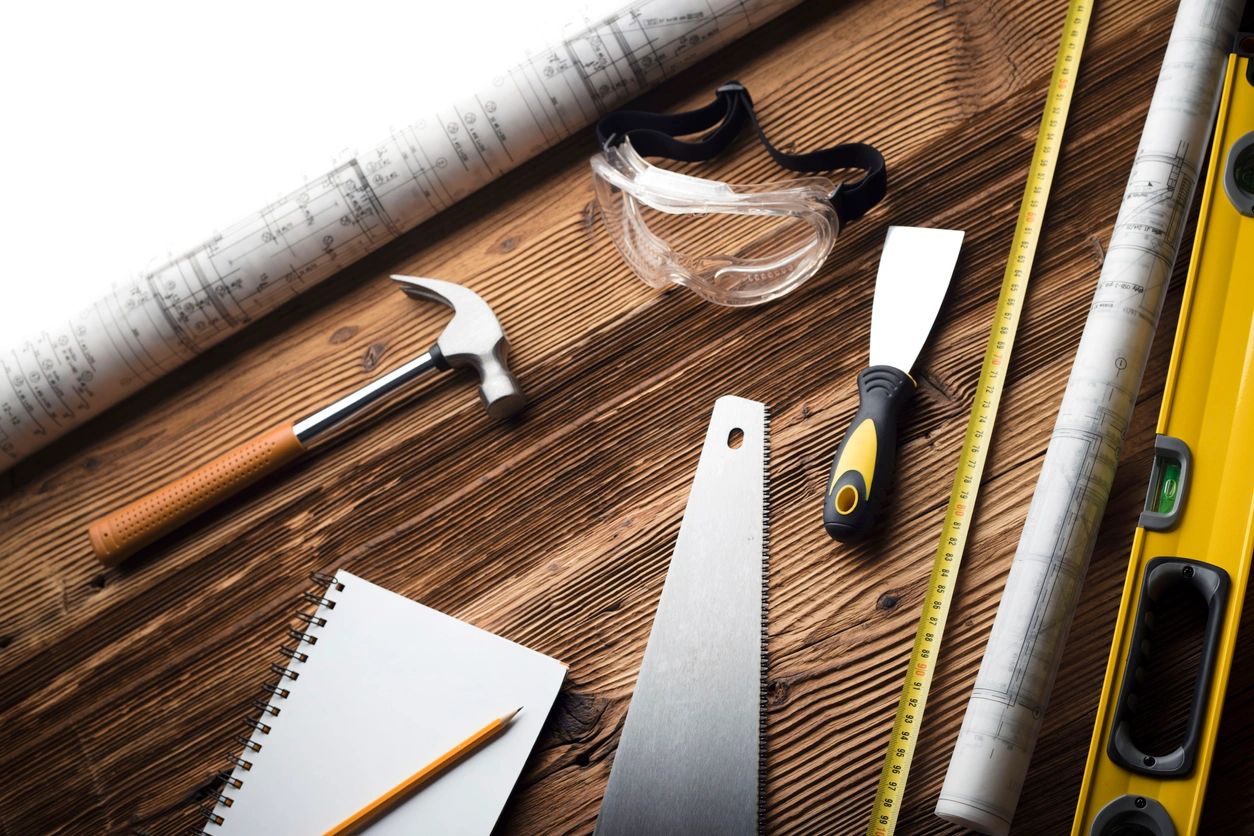
The Starter Toolkit: What You Actually Need (Not the Fancy Stuff)
Before we dive into projects, let’s talk tools. Ignore the $1,000 catalogs. Here’s your beginner kit:
| Tool | Why You Need It | Approx. Cost |
|---|---|---|
| Claw hammer | Driving and removing nails | $15-25 |
| Measuring tape | “Measure twice, cut once” is real | $10-15 |
| Combination square | Making sure corners are actually square | $12-20 |
| Hand saw or circular saw | Cutting wood to size (hand saw is cheaper and safer to learn on) | $15 (hand) / $60 (circular) |
| Power drill | Drilling holes and driving screws | $40-80 |
| Sanding block or orbital sander | Smoothing rough edges | $10 (block) / $40 (sander) |
| Level | Making sure your benches don’t wobble | $15-25 |
| Safety glasses | Non-negotiable. Eyes don’t grow back. | $8-15 |
| Ear protection | Power tools are loud. Your future self will thank you. | $10-20 |
Total beginner setup: $110-160. That’s less than a night out.
Safety First (Because I Want You to Keep All Your Fingers)
Carpentry is rewarding. It’s also, you know, sharp blades and heavy objects. A few non-negotiable rules:
- Wear safety glasses. Every single time. Even when “just making one quick cut.” Sawdust and splinters don’t care about your schedule.
- Keep your workspace clean. A cluttered bench is an accident waiting to happen. Clear off sawdust, put tools back, don’t trip over extension cords.
- Cut away from your body. Always. If a saw slips, you want it moving away from you, not toward your other hand.
- Unplug power tools when changing blades or bits. This sounds obvious. It’s also how people lose fingers. Don’t be that guy.
- Know your limits. Tired? Frustrated? Rushing? Stop. Woodworking tomorrow is better than stitches today.
The U.S. Consumer Product Safety Commission estimates thousands of table saw injuries occur annually. Most are preventable with basic precautions. Don’t become a statistic.
5 Simple Projects to Build Your Skills (and Your Confidence)
These projects are ordered from easiest to slightly less easy. Start at the top if you’ve never held a hammer.
Project 1: The Entry Bench
Difficulty: ★★☆☆☆ (An afternoon, maybe four hours)
What it is: A simple wooden bench for your entryway, mudroom, or the end of your bed. Perfect for sitting down to tie shoes or dropping grocery bags.
What you’ll need:
- One 2×10 board (4 feet long) – the seat
- Two 2×4 boards (18 inches each) – the legs
- Two 2×4 boards (15 inches each) – the stretchers (horizontal braces)
- 2.5″ wood screws
- Wood glue
- Sandpaper (80, 120, and 220 grit)
Step-by-step:
- Cut your seat board to 36 inches long (if using a 4-foot board).
- Cut two legs to 18 inches each.
- Cut two stretchers to 15 inches each.
- Sand everything smooth before assembly. Trust me. It’s harder to sand once assembled.
- Attach each leg to the underside of the seat using glue and screws (pre-drill to avoid splitting).
- Attach the stretchers between the legs about 2 inches up from the bottom.
- Sand again, focusing on the seat surface (you’ll sit here).
- Stain, paint, or seal with polyurethane.
Optional upgrades:
- Add a shelf between the stretchers for shoe storage
- Add casters to the bottom for a rolling bench (great for workshops)
- Add a cushion from a fabric store (staple gun required)
Why it’s great for beginners: Straight cuts only. Forgiving design (a slightly wobbly bench still works). Instantly useful the moment you finish.
Pro tip: If your bench wobbles, don’t panic. Flip it over and screw a small shim (a thin piece of wood) onto the bottom of the shorter leg. No one will ever know.
Project 2: The Simple Bookcase
Difficulty: ★★★☆☆ (A weekend project, very achievable)
What it is: A freestanding bookcase with three shelves. No fancy joinery. No angled cuts. Just a solid box that holds books.
What you’ll need:
- One 1×12 pine board (6 feet long) – each shelf
- Two 1×10 boards (6 feet long) – the sides
- One 1×8 board (3 feet long) – the back (optional but recommended)
- 2″ wood screws
- Wood glue
- Level
- Sandpaper
Cut list (adjust based on your desired dimensions):
- Two sides: 36″ tall × 10″ wide
- Three shelves: 30″ long × 10″ deep (if using 1×12 lumber, actual depth is 11.25″)
- One back panel: 36″ tall × 30″ wide (optional)
Step-by-step:
- Cut your sides to 36 inches.
- Cut your shelves to 30 inches.
- Mark shelf positions on the sides: bottom shelf at 2 inches from the floor, middle shelf at 18 inches, top shelf at 34 inches.
- Apply glue to the ends of each shelf.
- Attach shelves to the sides using screws (two screws per connection point).
- Flip the bookcase onto its face and attach the back panel with small nails or screws.
- Sand everything. Corners, edges, shelf surfaces.
- Stain or paint.
Why books won’t fall through: You’re building a rigid box. The back panel keeps everything square. Without it, the bookcase will lean like the Tower of Pisa.
Skill builder: This project teaches layout (marking where shelves go), square assembly, and the importance of a back panel. Every bookcase you build from here will use these same principles.
Cost comparison: A similar store-bought bookcase runs $80-150 and is made of particle board. Yours costs $40-60 and your kids could jump on it.
Project 3: The End Table (Nightstand)
Difficulty: ★★★☆☆ (Weekend project, one of the most rewarding)
What it is: A small table that sits next to your couch or bed. Big enough for a lamp, a glass of water, and your phone. Small enough to build in a weekend.
What you’ll need:
- Two 1×4 boards (4 feet each) – legs
- One 1×12 board (2 feet long) – top
- One 1×8 board (2 feet long) – lower shelf
- 2″ wood screws
- Wood glue
- Sandpaper
- Optional: Hairpin legs if you want a different look
Cut list:
- Four legs: 20″ tall (cut from the 1×4 boards)
- Top: 16″ × 12″ (cut from 1×12)
- Lower shelf: 16″ × 8″ (cut from 1×8)
- Apron pieces (connects legs): Four 12″ pieces from leftover 1×4
Step-by-step:
- Cut all pieces to size.
- Build two “U” shapes by attaching apron pieces between two legs (glue and screws).
- Connect the two “U” shapes with the remaining apron pieces to form a leg frame.
- Attach the lower shelf between the legs about 4 inches from the floor.
- Attach the top to the leg frame using glue and screws from underneath (so no screw heads show).
- Sand aggressively. End tables get touched constantly.
- Stain, paint, or seal.
Why this is a milestone project: You’ll build a real piece of furniture with multiple components, learn about aprons (the horizontal pieces that make tables sturdy), and create something you’ll use every single day.
Pro tip: Add small felt pads to the bottom of the legs. They protect your floors and make the table slide instead of drag.
Project 4: The TV Stand (Media Console)
Difficulty: ★★★★☆ (A full weekend, but absolutely doable for a determined beginner)
What it is: A low, wide table for your television, cable box, game console, and the remote controls you’ve lost three times.
What you’ll need:
- Two 1×12 boards (8 feet each) – top, shelves, and sides
- 2.5″ wood screws
- Wood glue
- Sandpaper
- Optional: Casters for a rolling stand
Cut list (dimensions for a 48″ wide stand):
- Top: 48″ × 12″
- Bottom shelf: 48″ × 12″
- Two sides: 20″ tall × 12″ deep
- Two interior shelves: 22″ long × 10″ deep (these fit between the sides and the center divider)
- One center divider: 20″ tall × 10″ wide
Step-by-step:
- Cut all pieces to size.
- Attach the center divider to the bottom shelf (glue and screws).
- Attach the two sides to the bottom shelf.
- Attach the interior shelves between the sides and the center divider at your desired heights (one at 5 inches for game consoles, one at 10 inches for cable boxes).
- Attach the top last, screwing down through the top of the sides and center divider (or up from underneath if you want hidden screws).
- Cut a hole in the back of each compartment for cable management (use a jigsaw or drill a large hole).
- Sand everything thoroughly.
- Stain or paint.
Important design note: Make sure your TV stand is wide enough for your television. A 55″ TV needs a stand at least 48″ wide. A 65″ TV needs 56″ or more. Measure before you cut.
Why build your own: Store-bought TV stands are famous for collapsing under the weight of modern televisions. Yours will be solid wood. Your great-grandchildren could use this stand.
Cable management trick: Drill a 2-inch hole in the back of each compartment. Then run all cables through a single hole in the back of the stand. No visible wires. You’ll look like a pro.
Project 5: The One-Board Coffee Table
Difficulty: ★★★☆☆ (Weekend project, requires patience but no advanced skills)
What it is: A small coffee table or side table made from a single 2×12 board. Yes, one board. This is a classic beginner project for a reason. It looks expensive. It costs almost nothing.
What you’ll need:
- One 2×12 board (8 feet long)
- Four hairpin legs (available online or at hardware stores, $25-40 for a set)
- Wood glue
- 2″ screws
- Wood filler
- Sander (orbital sander makes this much faster)
- Level
Step-by-step:
- Cut the 2×12 into:
- Two 18″ pieces (these become your tabletop surface)
- Two 15″ pieces (these become your lower shelf)
- The remaining wood becomes support blocks (cut four 4-inch blocks)
- Glue and screw the two 18″ pieces together side by side to make a 34″ wide top. Use cauls or clamps to keep them flat while the glue dries.
- Repeat for the two 15″ pieces to make a 29″ wide lower shelf.
- Attach support blocks between the top and lower shelf. Place one block near each corner.
- Sand. Then sand again. Start with 80-grit, move to 120, finish with 220 grit. The smoothness of the top will determine how nice the table looks.
- Fill screw holes with wood filler. Let dry. Sand again.
- Stain or seal with polyurethane (three thin coats is better than one thick coat).
- Screw hairpin legs into the bottom corners of the lower shelf.
Why 2×12 lumber? It’s cheap (about $20 for an 8-foot board), widely available, and surprisingly beautiful when sanded and stained. The rough construction lumber becomes furniture with just a few hours of work.
Critical warning: 2×12 lumber can warp. When you buy it at the hardware store, stand it on end and look down the length. Reject any board that looks like a banana. Also check for large knots – small knots add character, large knots weaken the board.
Why this is a crowd-pleaser: When friends ask where you bought it, you get to say, “I made it from one board.” That never gets old.
Finish options:
- Dark walnut stain – rich and traditional
- Natural with clear polyurethane – light and modern
- Whitewash – farmhouse style
- Black paint with natural wood top – industrial look
Pro Tips From 15 Years of Making Mistakes
Measure twice, cut once. I cannot stress this enough. I have wasted hundreds of dollars of lumber rushing a single measurement. Slow down.
Pre-drill your holes. Especially near the end of a board. Wood splits. Screws follow the path of least resistance. A tiny pilot hole prevents heartbreak.
Buy better wood than you think you need. Construction-grade 2×4s are fine for shop projects. For furniture you’ll see every day? Spend the extra $10 on pine or poplar. You’ll thank yourself when you’re sanding.
Embrace imperfection. Your first bookcase might wobble slightly. Your TV stand might have a gap. That’s okay. The store-bought version is made by machines. Yours has character.
Finish what you start. The number of half-complete projects gathering dust in garages is a national tragedy. Pick something small. Finish it. Then pick the next thing.
Use a level, not your eyes. Your eyes lie. A level doesn’t. Check every table, bench, and stand before you call it done.
Where to Learn More (Because One Article Isn’t Enough)
YouTube channels worth your time:
- Steve Ramsey – Woodworking for Mere Mortals: Perfect for beginners. No intimidation. No $5,000 tools.
- Ana White: Free furniture plans with cut lists and step-by-step photos. Hundreds of projects including most of the ones above.
Essential reading:
- The Anarchist’s Tool Chest by Christopher Schwarz – Yes, the title is weird. The book is a masterclass in why tools matter and which ones actually earn their place in your shop.
- The Complete Manual of Woodworking by Albert Jackson – The encyclopedia. Keep it in your workshop.
Safety resources:
- U.S. Consumer Product Safety Commission – Power Tool Safety: The agency’s safety guidelines for all common woodworking tools.
Community:
- r/BeginnerWoodWorking on Reddit: 500,000+ beginners posting their first projects, asking for advice, and celebrating wins. Incredibly supportive and non-judgmental.
Free plans for all five projects:
- Ana White’s website has free, downloadable plans with cut lists and shopping lists for every project described above.
The Bottom Line
You don’t need a garage full of Festool gear. You don’t need a decade of experience. You need a measuring tape, a saw, a drill, and the willingness to make something imperfect.
Start with the entry bench. Build the bookcase. Make the end table. Tackle the TV stand when you’re feeling brave. And finish with that one-board coffee table that will impress everyone who sees it.
By the time you complete all five, you won’t be a beginner anymore. You’ll be the guy your friends ask to help with their projects.
Every master carpenter was once someone who didn’t know how to measure an inch. The only difference is they started.
Now go build something.
Bonus Section
Three essential links to take your skills from “I made a birdhouse once” to “Yeah, I built that coffee table”:
1. Steve Ramsey’s Woodworking for Mere Mortals (YouTube)
The Link: YouTube.com/@SteveRamsey-WoodworkingforMereMortals
Why you need it: Steve is the Bob Ross of the garage workshop. He has over 1.96 million subscribers precisely because he doesn’t assume you own a $5,000 cabinet saw . His entire channel is built on the philosophy that you can build awesome stuff with a limited budget and limited space. He offers practical power tool techniques without the intimidation.
2. Ana White’s Free DIY Plans (Ana-White.com)
The Link: Ana-White.com
Why you need it: This is the holy grail of project plans. Since 2009, Ana has provided complex, professional-looking furniture plans for free . What makes her site specifically useful for the projects we discussed (Entry Benches, Bookcases, TV Stands) is that she provides shopping lists and cut lists. You literally walk into Home Depot with her list, buy the wood, and follow the diagrams. She has over 50,000 reader-submitted photos, so you can see real guys just like you nailing these projects .
3. Reddit’s r/BeginnerWoodWorking
The Link: Reddit.com/r/BeginnerWoodWorking
Why you need it: The comment sections on YouTube are fine, but this community is your 24/7 safety net. With nearly 650,000 members, this is where you go to ask “Why is my table wobbling?” or “How do I fix this stripped screw?” . More importantly, it’s where you go to see honest “first project” photos. It keeps your expectations realistic (your first dovetail joint might look like a dog chewed it) and keeps you motivated.
Pro Tip: Bookmark Ana White for the plans, watch Steve Ramsey for the technique, and browse Reddit for the confidence. That trio will get you through every one of the five projects listed above.